
Ever had someone say, “Just drop me a message,” and then you couldn’t find a way to do it? Frustrating, right? Well, that’s exactly how your visitors feel when your WordPress site doesn’t have a contact form. The good news is, you don’t need to be a tech wizard, write code, or even pretend to understand it. With a few clicks (and maybe a sip of coffee), you can set up a professional, user-friendly contact form.
In this post, I’ll walk you through the simple, no-coding-needed steps to get one live today.
Step 1: Choose the Right Contact Form Plugin
Here’s the thing: WordPress doesn’t come with a built-in contact form. But don’t worry, that’s where plugins save the day. Think of them as your toolbox, packed with ready-to-use gadgets so you don’t have to reinvent the wheel.
For beginners, WPForms is a lifesaver. It’s super easy, drag-and-drop, and it “just works.” Other solid options include Contact Form 7, Ninja Forms, and Formidable Forms if you like more power.

Pick one that matches your comfort level. No worries. You can always switch later if you change your mind.
Step 2: Install and Activate the Plugin
Alright, you have picked your plugin. Now let’s actually get it onto your WordPress site. Don’t worry, this isn’t like downloading sketchy software from the dark corners of the internet. It’s all safe and right inside your WordPress dashboard.
Just head over to Plugins → Add New, type the plugin name (say, “WPForms”) into the search bar, and hit Install Now.
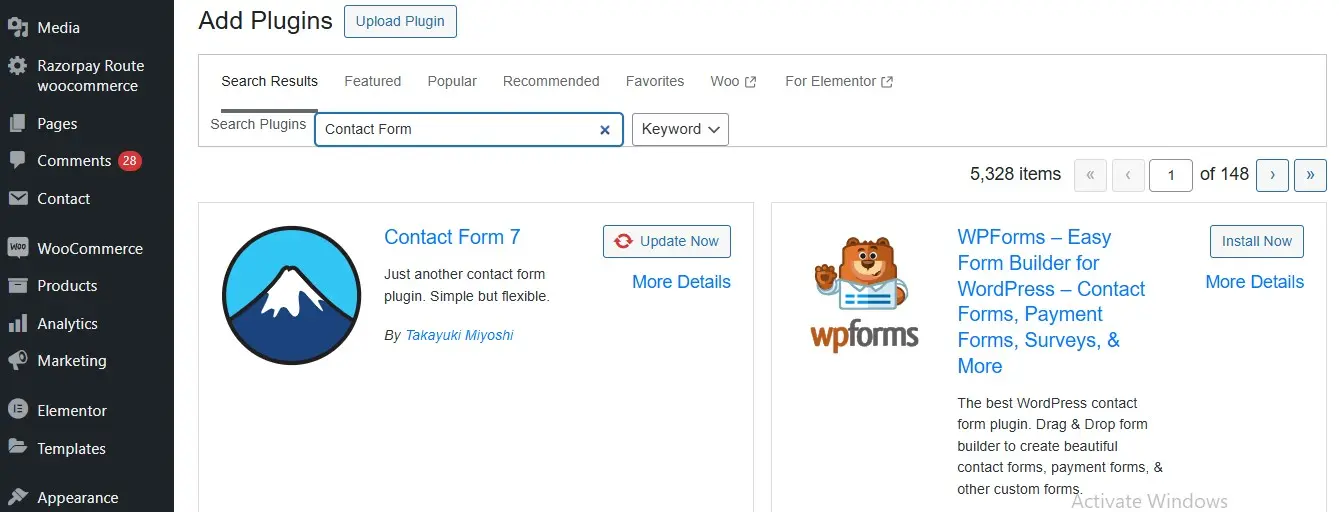
Once it’s installed, click Activate, and you’ve got yourself a contact form builder ready to roll.
Step 3: Create Your First Contact Form
Now comes the fun part, which is building your form. Don’t panic, this isn’t “coding in the Matrix.” It’s more like dragging Lego blocks into place.
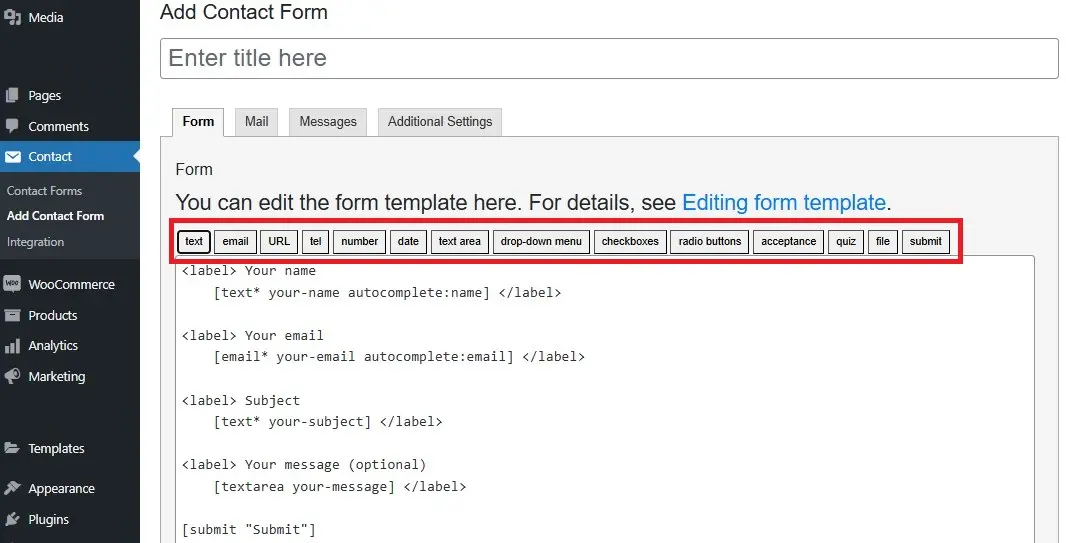
Go to your WordPress dashboard, find your plugin (Like, WPForms), and click Add Contact Form. You’ll see options to add fields like text, email, UR, and many more. Now, click on the field options and craft your contact form according to your preferences.
From there, you can drag in fields like Name, Email, and Message. Want to ask for a phone number or company name? Just add it where you want it in your contact form.
Think of it as customizing your own mini digital receptionist.
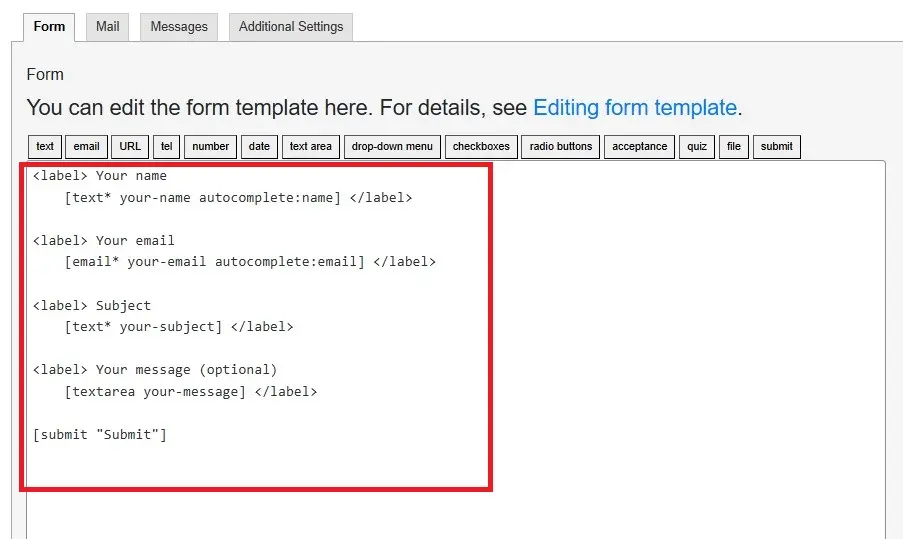
Step 4: Customize Your Contact Form Fields
Here’s where you get to play designer. Your form template is ready, but it’s not carved in stone. So let’s tweak it.
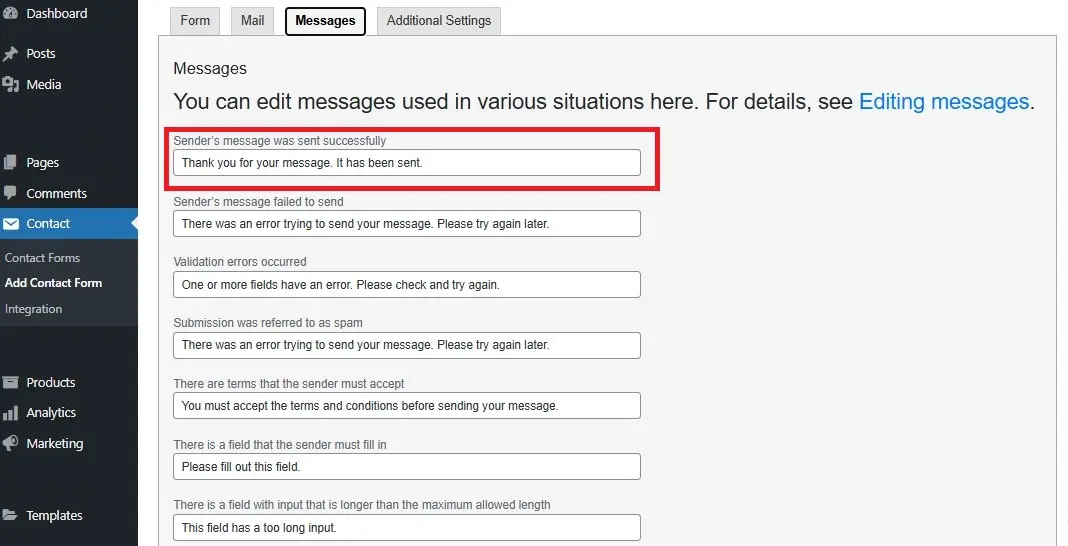
Maybe you don’t really need someone’s mailing address. In that case, delete the extra fields. You can even adjust placeholder text to make things friendlier, like “Thank you for your message. It has been sent.”
Keep it simple. The fewer hoops people jump through, the more likely they’ll hit Submit instead of Close Tab.
Step 5: Configure Form Settings
Alright, your form looks great, but now we need to decide what happens after someone hits Submit. Because if the message just vanishes into the void, that’s… not ideal.
First, set up Email Notifications so submissions land in your inbox (no crystal ball required). Most plugins let you easily type in the email address where messages should go.
Next, customize the confirmation message with a simple statement: “Thanks! We’ll get back to you soon” does wonders. Want to impress? Redirect them to a thank-you page instead.
And don’t skip spam protection. A CAPTCHA or reCAPTCHA saves you from bots that want to sell you sunglasses at 3 a.m.
Step 6: Add the Contact Form to a Page or Post
Time to show off your shiny new form. Luckily, adding it to your site is easier than adding pineapple to a pizza.
If you’re using Gutenberg, just add a Form Block (like the one WPForms provides), select your form, and it instantly appears. Prefer the old-school way? Copy the shortcode your plugin gives you and paste it into any page or post.
Want it in your sidebar or footer? Most plugins let you drop it in a widget too. Now your visitors can reach you anywhere.
Step 7: Test Your Contact Form
Okay, your form is live, but don’t just sit back and assume it works. (That’s how you end up missing messages and wondering why no one loves you.)
Do a quick test: fill it out like you’re a visitor. Use your real email address and send a message. Then, check your inbox. Did it arrive? Great. Did it disappear into the Bermuda Triangle of the internet? Time to double‑check your notification settings.
Pro tip: test on both desktop and mobile, because if it doesn’t work on a phone, half your audience won’t bother.
Step 8: Style Your Form for a Better User Experience
Your form is working, but now, let’s make sure it looks like it belongs on your site.
Most plugins let you tweak basics like colors, button styles, and field sizes. Match them to your site’s branding so the form feels like part of the family. Also, keep plenty of white space so it doesn’t feel cramped.
And don’t forget mobile styling. If users have to pinch, zoom, or squint just to say “Hello,” they’ll probably say “Goodbye” instead.
Bonus Tips for an Effective Contact Form
Before you praise yourself on the back, here are a few quick wins to make your form even better:
- Keep it short: more fields = fewer submissions.
- Use clear labels so visitors know exactly what to fill in.
- Make your button friendly: “Send Message” beats “Submit” any day.
- Add a privacy checkbox if you collect personal data.
Conclusion
And there you have it. A fully functional and stylish contact form in WordPress, built without writing a single line of code. With just a few clicks, you’ve made it easy for visitors to reach you.
So go ahead and publish that for. Test it, and start welcoming messages. Who knows? Your next lead, client, or opportunity could be filling it out right now.